If you want enterprise-level email deliverability without the enterprise-level price tag, integrating your WordPress newsletter with Amazon SES is the way to go. This setup lets you send thousands of emails for a fraction of what traditional services charge, making sure your messages actually land in the inbox.
Before we get into the nuts and bolts, it’s worth understanding why this combination is such a game-changer. Switching from your basic WordPress mail function or a pricey email platform isn't just about swapping tools. It's about fundamentally upgrading how you connect with your audience—both effectively and affordably.
The real magic boils down to three things: cost, scale, and deliverability. Each one solves a major headache that most creators and business owners face.
Let’s be real: money matters. Most email marketing platforms charge you based on your subscriber count, and those costs can spiral as your list grows. A list of 10,000 subscribers could easily set you back over $100 a month, even if you only send a couple of newsletters.
Amazon SES completely changes the game with its pay-as-you-go pricing. It’s a popular choice for WordPress users because it’s incredibly scalable and boasts high deliverability rates. The pricing starts at just $0.10 per 1,000 emails, which is a world away from the per-subscriber model. You can find some interesting newsletter statistics over on Supsystic.com that highlight the importance of email.
Think about it: sending a weekly newsletter to 10,000 subscribers might cost you as little as $4 per month with SES. Compare that to the $100+ you’d pay elsewhere. That's a huge saving you can put right back into your business.
To put this in perspective, here’s a quick breakdown of how Amazon SES stacks up against the all-in-one platforms.
This table offers a clear side-by-side look at the key differences you can expect.
As you can see, the trade-off for the incredible cost savings is a bit more upfront work. But for many, the long-term benefits are well worth it.
What happens when your audience explodes from 1,000 to 100,000 subscribers? With many email services, that kind of growth means a massive bill and maybe even some performance hiccups.
Amazon SES is built on the same rock-solid infrastructure that Amazon uses for its own global email operations. It's designed for almost limitless scale.
Whether you're sending a handful of order confirmations or a campaign to a million people, the system handles it without breaking a sweat. This gives you peace of mind to grow your list as big as you want, without ever worrying that you'll outgrow your email provider.
At the end of the day, an email campaign is worthless if it ends up in the spam folder. This is where SES really shines. The default WordPress mail function is notoriously unreliable and a prime target for spam filters.
Amazon SES helps you bypass that problem with a robust sending infrastructure that has a stellar reputation with inbox providers. When you set things up correctly, you get the benefit of:
A little preparation goes a long way. Before you start connecting your wordpress newsletter amazon ses setup, getting a few key items in order will save you a ton of headaches later. Think of this as your mission brief—it'll make the whole process feel much smoother.
First things first, you'll need an Amazon Web Services (AWS) account. If you don't have one, go ahead and create it. This account is your gateway to Amazon SES. Once you're in, your very next move should be to create a dedicated IAM (Identity and Access Management) user.
Pro Tip: Never, ever use your main AWS root account for this kind of integration. Always create a specific IAM user and give it only the permissions it needs—in this case,
AmazonSESFullAccess. It’s a simple security step that protects your entire AWS environment.
This is a well-trodden path for good reason. WordPress powers a staggering 43.4% of all websites globally, making it the undisputed king of content management systems. Its popularity is exactly why so many great tools are built to integrate seamlessly with it, from newsletter plugins to powerful email services like Amazon SES.

After setting up your AWS account and creating that IAM user, you have one more non-negotiable step: verifying your domain in Amazon SES. This is how you prove to Amazon that you actually own the domain you want to send emails from. It's a fundamental part of establishing good email deliverability from day one.
Here’s a quick list of what you should have ready to go:
It’s also smart to make sure your WordPress site itself is in good shape for this. A solid WordPress setup guide can walk you through any final tweaks to prepare your environment.
Getting these pieces in place beforehand makes the actual integration a walk in the park. For a more detailed look at these initial AWS steps, our guide on the complete Sendy and Amazon SES setup is a great resource to keep open in another tab: https://www.sendybay.com/blog/sendy-amazon-ses-setup.
Once you’ve got these items checked off your list, you’re ready for the main event.
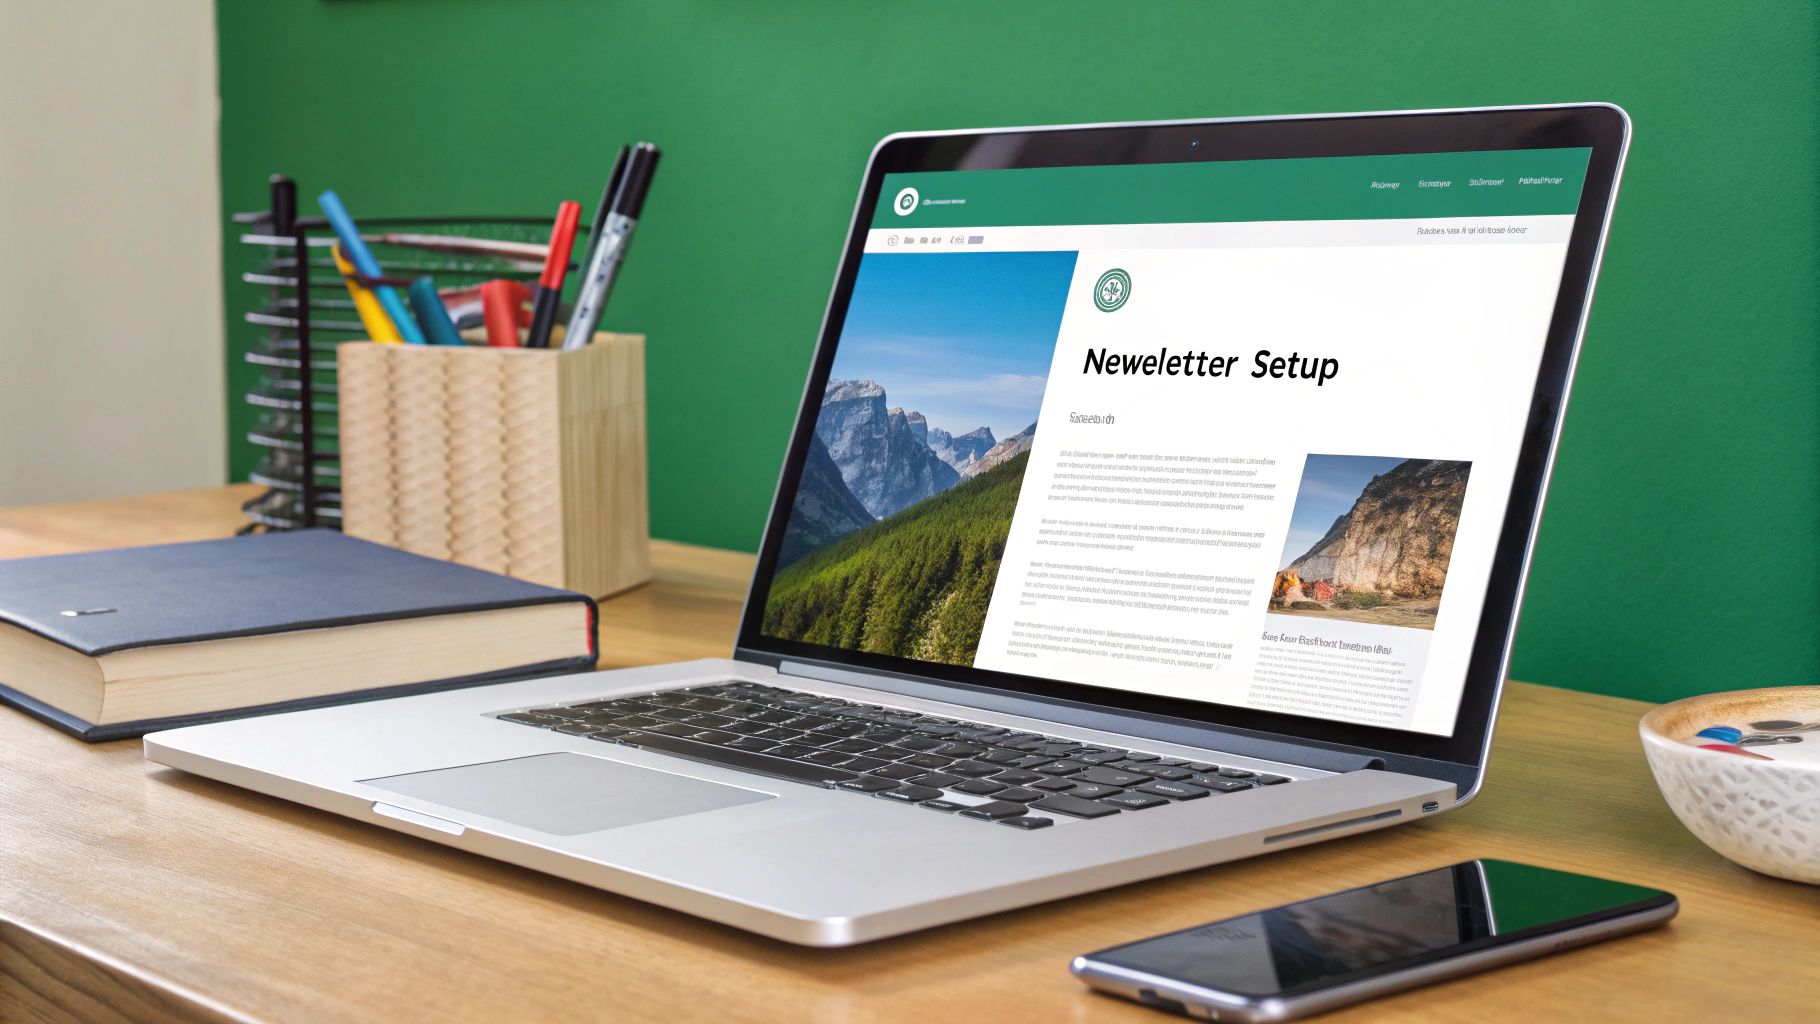
Alright, you've done the heavy lifting in your AWS account and your domain is officially verified. Now it's time for the fun part: connecting that powerful email engine to your WordPress site. This is where a specialized plugin becomes your best friend, acting as the bridge between WordPress and Amazon SES. We're going to use SendyBay for this, which makes the whole process surprisingly simple.
First things first, you need to get the plugin installed. If you've never done this before, it's a good idea to get familiar with how to install a plugin on WordPress. Once you've got the hang of it, just search for "SendyBay" right from your WordPress dashboard and get it installed and activated.
This image lays out the key milestones you're about to hit, from the AWS setup to getting the plugin dialed in.
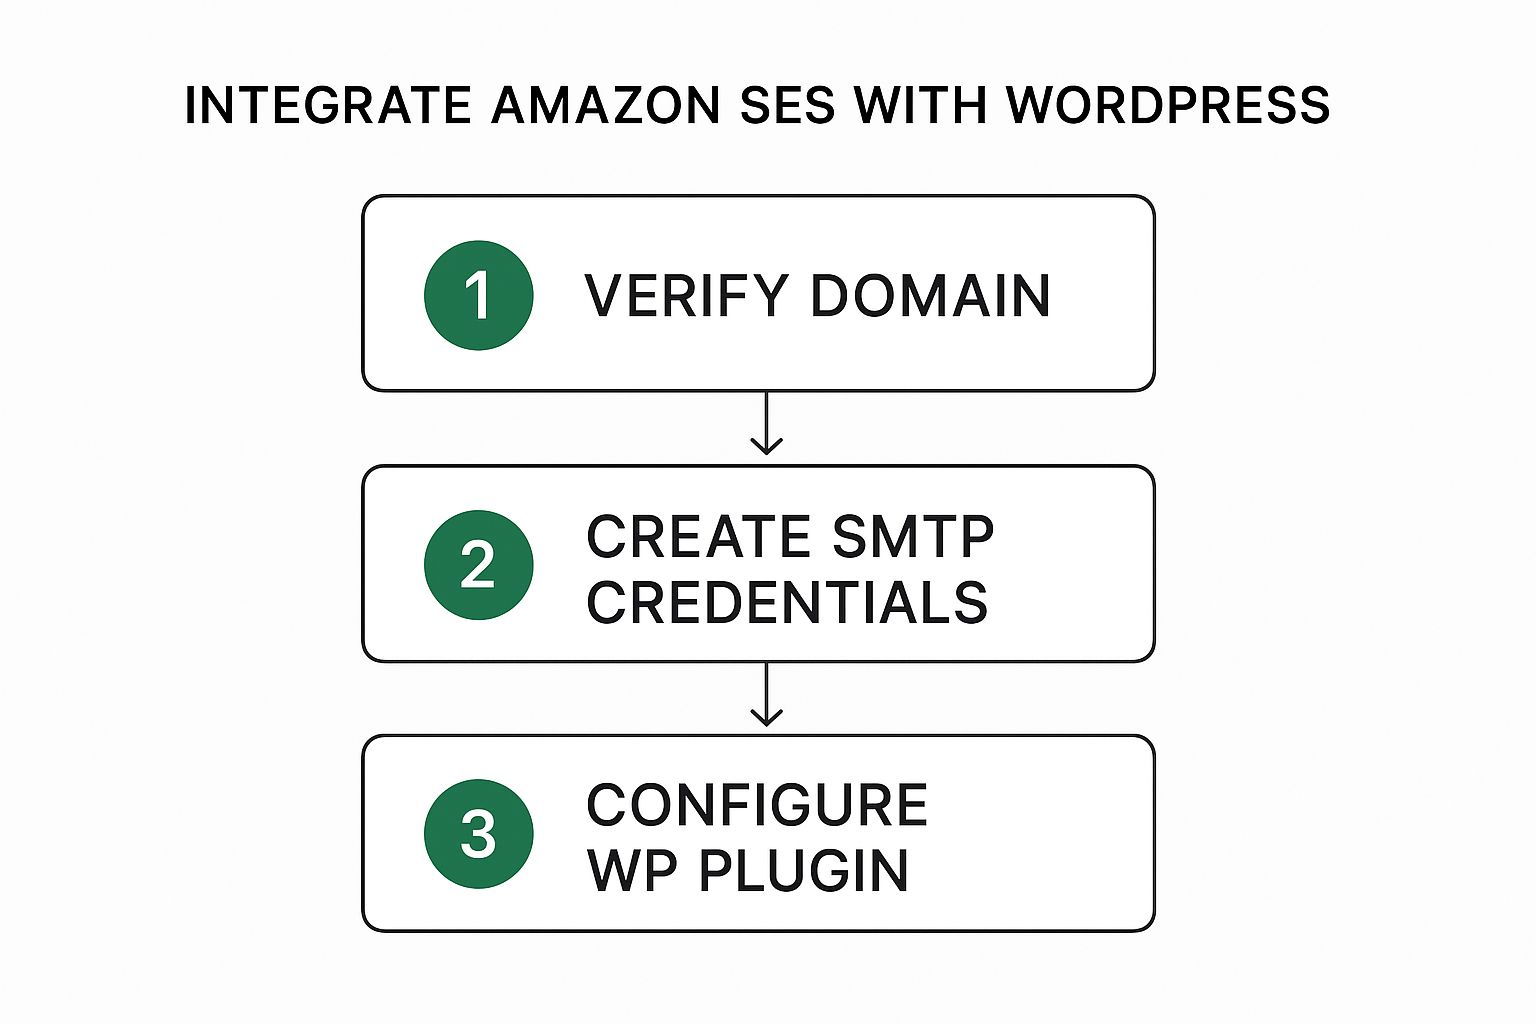
As you can see, it's a logical flow. We're building on the foundation you already set up, connecting the dots one by one.
To let WordPress send emails through your AWS account, you need a set of secure credentials. These are the Access Key ID and Secret Access Key for the IAM user you created earlier. Hopefully, you saved them somewhere safe.
If you can't find them, don't panic. You can always generate a new set. Just head back to the IAM section in your AWS Management Console, find your user, and click over to the "Security credentials" tab to create a new access key.
A Quick Security Warning: Your Secret Access Key is like a password. AWS only shows it to you once when you create it. If you lose it, it's gone for good—you can't retrieve it. You'll have to delete the old key and make a new one. Keep these credentials locked down.
With your keys ready, jump back over to your WordPress dashboard. Find the settings page for SendyBay, and you'll see the exact fields where these keys need to go.
This is the final piece of the puzzle. The SendyBay settings are where you'll plug in your credentials and tell WordPress exactly how to talk to Amazon SES.
The plugin has a clean interface designed to get you connected without any headaches. You'll want to carefully copy and paste your Access Key ID and Secret Access Key into the right spots. From my experience, a simple typo or a misplaced character here is the number one reason connections fail.
Next up is your AWS Region. This is critical. It has to be the exact same region where you verified your domain in SES. For example, if you set up your domain in us-east-1 (N. Virginia), you have to select that same region in the plugin settings.
Finally, you need to define your "From" email and name. The "From" email address must belong to the domain you verified with SES. If you try to use an email from an unverified domain, your emails will fail to send.
Here’s a quick checklist of what you'll be entering:
newsletter@yourdomain.com).Once you hit save, the handshake is complete. Your WordPress site is now officially set up to send all its emails through Amazon's high-deliverability network. You've just laid the groundwork for a reliable and scalable wordpress newsletter amazon ses system.
Alright, you’ve connected WordPress to Amazon SES, and all the technical pieces are in place. Now for the fun part: launching your first newsletter campaign.
This is where the rubber meets the road. It’s not just about writing a catchy subject line and hitting "send." To really succeed, you need to understand how SES works so you can build a stellar sender reputation right from the get-go.

Thankfully, the SendyBay plugin makes the creation process feel natural. You'll be working right inside your WordPress dashboard, using a familiar editor to build your newsletter, drop in your content, and pick your subscriber list. But the real strategy kicks in before you even think about scheduling it.
Amazon SES won't let you blast out a million emails on your first day. They use a quota system to protect their network and, more importantly, to help you build a good reputation.
Right out of the box, new SES accounts are in what's called "sandbox mode." This means you can only send emails to addresses you've personally verified. Your first task, if you haven't done it already, is to hop into your AWS console and request production access.
Once you’re approved for production, you’ll need to keep an eye on two important numbers:
These limits start out pretty low. They increase automatically over time, but only if you prove you're a responsible sender. This brings us to the crucial concept of "warming up" your account.
Think of warming up your SES account like building trust with a new acquaintance. You wouldn't bombard them with information all at once. Instead, you start slow.
Instead of emailing your entire list on day one, you begin with a small group of your most engaged subscribers. This simple action signals to email providers like Gmail that people actually want to receive your emails.
A smart warm-up schedule might look something like this:
This slow-and-steady approach is how you prove you're a legitimate sender. It helps Amazon increase your sending quotas and is absolutely essential for your long-term deliverability. Seriously, this step is non-negotiable for anyone using a wordpress newsletter amazon ses setup.
Of course, technical setup is only half the battle. Brushing up on general email marketing tips will help ensure the content you're sending is just as good as your delivery method.
Pro Tip: Hitting a huge list from a cold SES account is the fastest ticket to the spam folder. A patient warm-up builds a positive sender reputation that will pay dividends for years to come.
The warm-up process naturally leads you to another powerful email marketing tactic: list segmentation. Don't make the mistake of treating all your subscribers as one monolithic group. By dividing them based on certain criteria, you can send content that’s far more relevant and engaging.
For instance, you could start creating segments based on:
Using your WordPress plugin to target these smaller, more focused segments is a win-win. It makes your warm-up process smoother and will dramatically boost your open and click-through rates down the line. It turns your newsletter from a generic broadcast into a welcome, personal conversation.
Sending your newsletter is just the starting line. The real work—and the real results—begin when you start paying attention to what happens after you hit send. Your wordpress newsletter amazon ses setup is a powerful engine, but you still need to be the pilot, using data to steer your campaigns toward success.
Think of your first few newsletters as a test run. You've sent your message out into the world, and now you're waiting for the response. That response comes in the form of cold, hard data that tells you exactly what’s working and what’s falling flat.
Thankfully, you don't have to guess. Most WordPress plugins that connect with Amazon SES, like SendyBay, give you a dashboard packed with the numbers you need. You'll typically see four key metrics right away: Sent, Opened, Unique Opened, and Clicked.
While your mileage will vary, a healthy open rate for these kinds of campaigns often lands somewhere between 15% and 30%. For click-through rates, anything from 2% to 10% is a pretty solid range. If you want to dive deeper, exploring broader newsletter management strategies can give you a better feel for these benchmarks.
Let's quickly break down what these metrics are telling you:
These aren't just numbers to report on; they're vital signs for the health of your entire email marketing effort.
Data is only useful if you do something with it. The whole point is to use these analytics to get more of your emails into the inbox and get more people to engage with them.
Your sender reputation is your most valuable asset in email marketing. Every metric, from bounces to complaints, directly impacts how inbox providers like Gmail and Outlook view you. Protect it fiercely.
Start with the low-hanging fruit. If your open rates are in the gutter, your subject lines are the first thing to fix. Try asking a question, adding a bit of personalization, or creating some urgency. Running a simple A/B test on a small part of your list can give you a clear winner in no time.
If your CTR is low, the problem is inside the email itself. Are your links obvious? Is your call-to-action clear and singular? Sometimes, giving people too many things to click on just confuses them, and they end up clicking nothing at all.
Finally, and this is non-negotiable, you have to practice good list hygiene. This means regularly cleaning out subscribers who haven't opened an email in months and immediately removing any address that hard bounces. A clean list is an engaged list, and that’s the secret to making your WordPress and Amazon SES integration really shine.
Even after a perfect setup, you're bound to have a few questions. Let's be real—connecting a powerful service like Amazon SES to your WordPress newsletter system is a significant move. Getting the details right can make or break your email strategy, so let's walk through some of the most common things people ask.
This is probably the most frequent—and frustrating—question I hear. You've set up a world-class delivery engine, so why are your carefully crafted newsletters ending up in the junk folder?
The truth is, Amazon SES is like a high-performance car engine; it gives you the power, but you still have to drive it well. Your sender reputation is what really determines where your emails land.
More often than not, the culprit is a simple setup mistake, like improper domain authentication. If your SPF and DKIM records aren't configured correctly, inbox providers have no way of verifying you are who you say you are. Another huge factor is a tarnished reputation from high bounce rates or, even worse, spam complaints from your subscribers.
The single biggest mistake I see new users make is sending a massive blast to an old, uncleaned list from a brand-new SES account. That's a surefire way to get flagged. You absolutely have to warm up your account slowly and be ruthless about list hygiene.
Okay, let's talk about money. Can you really use Amazon SES for free with WordPress? The short answer is yes, with a couple of caveats, and it's one of the biggest reasons this setup is so popular.
Amazon SES has an incredibly generous free tier that puts it within reach for just about everyone.
Once you go past the free limit, the pay-as-you-go pricing is ridiculously low. This makes it an incredibly affordable solution that scales with you as your audience grows, without the sticker shock you get from other platforms.
This is a great question because it gets to the heart of what this setup is all about.
Think of Amazon SES as just the delivery infrastructure. It’s the behind-the-scenes powerhouse that ensures your emails get sent reliably and quickly. By itself, it doesn't offer a fancy email editor, a dashboard to manage your lists, or analytics to track your campaigns.
An all-in-one service like Mailchimp bundles all of that together for you: the design tools, the list management, and the sending engine. You pay a premium for that convenience, and you often have less direct control over your sending reputation.
When you use a plugin to connect WordPress with Amazon SES, you're creating the perfect hybrid. You get a familiar, user-friendly interface to manage your wordpress newsletter amazon ses campaigns right inside your own website. At the same time, you're tapping into the unbeatable deliverability and low cost of Amazon's infrastructure. You really do get the best of both worlds.
Ready to harness the power of Amazon SES without the technical headaches? SendyBay offers a one-click setup with a drag-and-drop builder, list cleaning, and everything you need to launch high-speed campaigns for a fraction of the cost. Get started today at SendyBay.
Article created using Outrank